

The Ultimate Carry all bag by Quiltessa
- michrauf

- Sep 25, 2021
- 1 min read
Part Nine
Making the tabs for the separating zipper.
This is for the top of the bag. In her video Natalie mentions about adding interfacing to at least one of the strips. I added interfacing to all the strips to make them sturdier. This was all straightforward to do. I wasn’t sure if the long sides had to be sewn together or but, but they are.



Part Ten
putting together lining, ironing pad and zipper tabs.
I decided to make my bag with a removable ironing pad, so I just added a base lining to the whole length of the inside of the bag. I then cut the ironing pad a little shorter all round and sewed on some binding. I added poppers ( press studs) to each corner to secure it to the bottom.


Full length lining on bottom inside.


Showing press studs in corner of ironing pad.


With tab attached, and length of ironing pad.
Natalie says that a stitch in the ditch is optional, which I did, but managed to catch the top of the handles in it ( as I was sewing with the handles underneath), so had to unpick it… something to be aware of…


Handle caught in stitching, so had to re-do it.

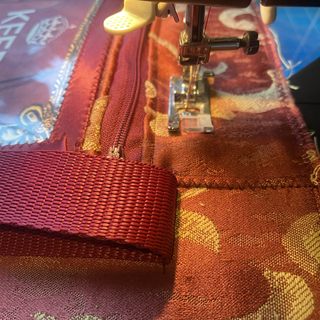


Coming along though.


Comments